Nine-Patch Drawstring Bag Tutorial
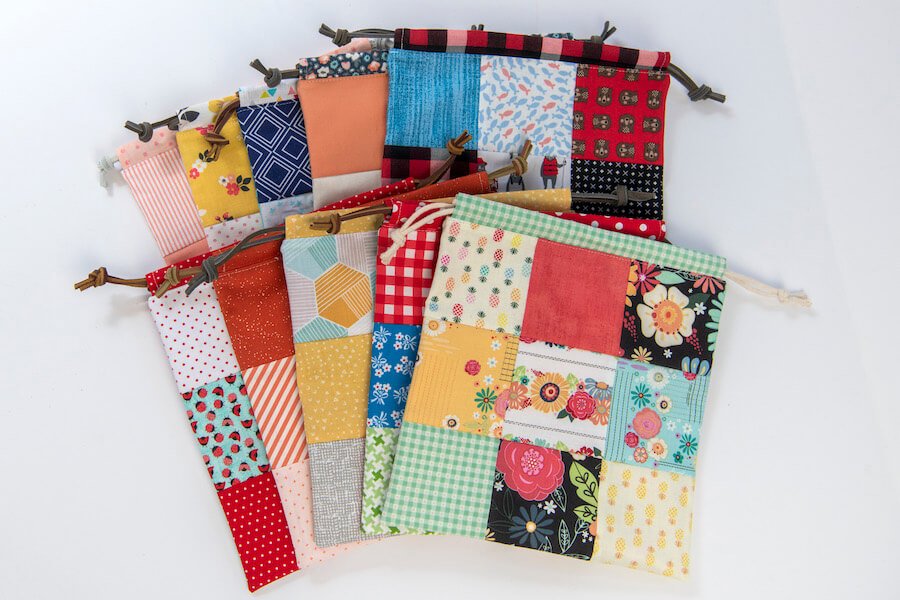
Hi, friends! Today I’m going to share a fun little project I’ve been obsessively making lately. It’s a fantastic scrap buster and comes together quickly — a perfect little project for a reusable gift bag, toy storage, or travel pouch to keep yourself organized. Let’s get sewing.
Supplies
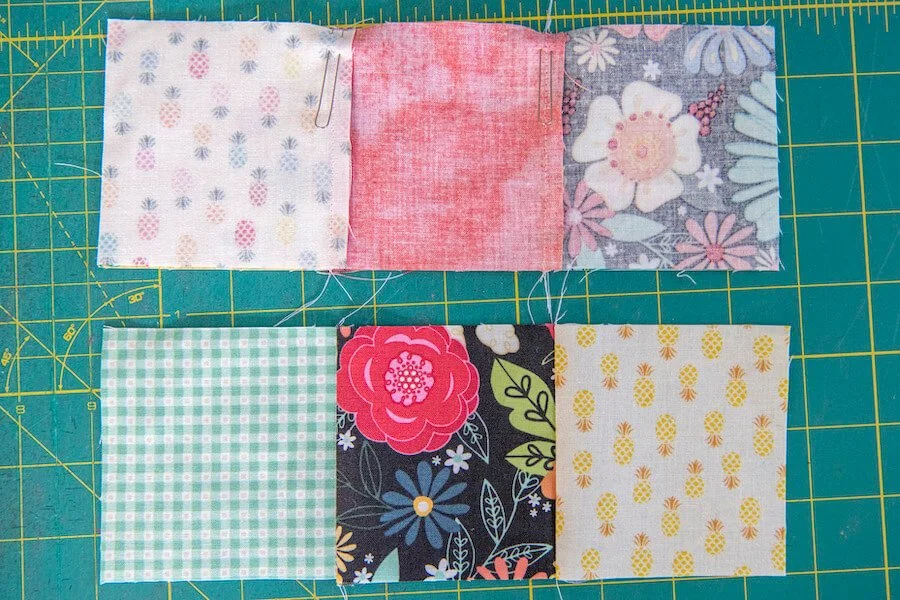
(18) 3.5” squares
(2) 9.5”x9.5” squares
(2) 2”x9.5” rectangles
(2) 26” ties

Cut out all of the pieces listed above. With your 3.5” squares you will be making two 3x3 panels. Take nine of your squares and lay them out in three rows of three.

First, sew the rows together using a ¼” seam allowance.
Next, pin your top two rows together and sew. To get the seams to match up perfectly, I press my row seams in opposite directions (so Row 1 press to the left, Row 2 to the right, and Row 3 to the left.) Butt the seams up against each other when pinning (I love fork pins for this so the fabric doesn’t shift on me when going through the machine) and sew.

Press the seam you just sewed. Pin the third row on to the bottom and press open. Make sure to press the seam in the same direction as the top row.

Repeat with the remainder of your nine 3.5” squares to make a second panel. When pressing the seams of the rows after sewing, press them in the opposite direction as your first panel. So if the seams in your first panel are pressed up, press the second panel's seams down.

Set your panels aside and grab your two 2”x9.5” rectangles. Lay on your surface right side up. On the ends fold the fabric in ⅛” and then over again another ⅛” and press. Repeat on both ends of each. Sew the folded ends.

Next, fold the rectangles in half and press as shown in the photo.

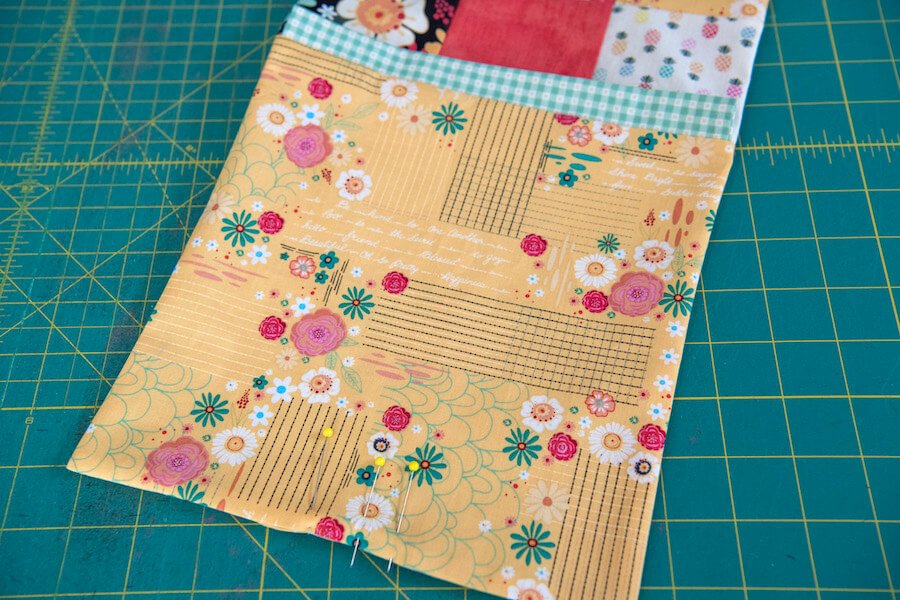
Alright, you are ready to start assembling your bag together. Grab your lining panels and your main panels. Lay one of your lining panels down on your work surface right side up. Place one of your drawstring channels (your folded rectangle) on top with raw sides facing up. Center it along the top edge of your lining.

Place your first nine-patch panel on top, right side down. Pin all three layers together across just the top edge (so the other three sides are not pinned). Sew using your ¼” seam allowance. Repeat with your remaining panels.

Press your seams open, pressing them in the same direction as your seams from the patchwork panel.

Place one panel on top of the other with the patchwork sides together and the lining sides together, right sides together. Pin the two together all along the perimeter making sure to butt the seams up against each other. You need to leave a 2-3” opening on the bottom of the lining side for turning. I like to place my pin horizontally there as a reminder.

Take to your sewing machine and sew all the way around except for where the opening will be. Turn right side out.
Turn completely right side out and push all the corners out. Press flat. Pin and sew the opening at the bottom closed.

Next, push the lining inside. Press the seam with the channel facing up.

Take to your sewing machine and top-stitch all around the top of your bag.

Lastly, you need to add the drawstrings. If you are using a stiffer strap like leather, you can just start sliding it through the channel. If you have a softer one like this smaller rope, fold one end over an inch and add a safety pin. Run it through one channel then take it through the second channel and tie the two ends together into a knot. Repeat with the second drawstring starting at the opposite side of your knot.