Vampire Halloween Banner

A while back I shared a pattern/tutorial for a Frankenstein banner. Since then I’ve made him a few friends. I like to make my banners five character flags long with the second and fourth being mummies since they don’t have ears and it seems to hang the best that way.

Supplies:
Pattern (DOWNLOAD HERE)
Purple 100% cotton fat quarter
Matching purple felt
Black felt
White felt
Heat N Bond Lite Iron-on Adhesive
Embroidery floss and needle
Bias tape
Marking tool
You can get three vampire character flags out of each fat quarter. If you want more flags, purchase more fabric. ½ yard for six character flags.
Print and cut out the pattern. Iron your fat quarter. I’ll be giving directions on how to make one vampire character flag. You can find the FRANKENSTEIN TUTORIAL HERE and the MUMMY TUTORIAL HERE if you’d like to make a banner with more of the characters.
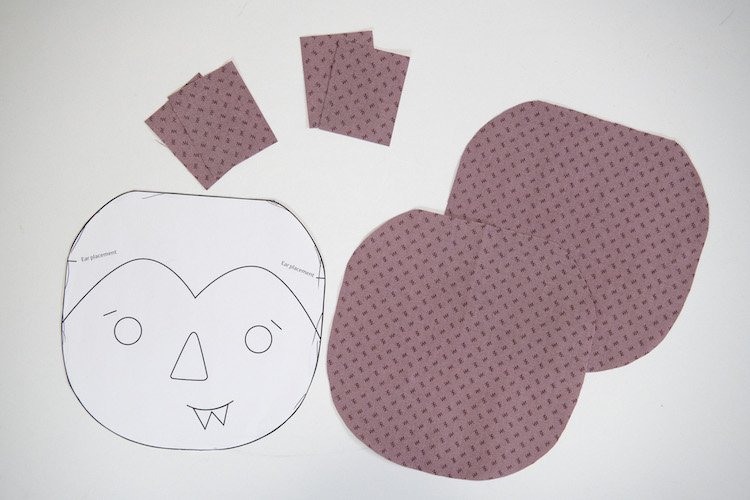
Trace two of your head pattern onto the wrong side of your main fabric and cut out. Also from your main fabric cut four 2” wide by 2.5” tall rectangles.

Match up your rectangles, rights sides together. Grab your ear pattern piece. Trace an ear in the center of each set of rectangles. Trace one ear facing left and one facing right (so mirror image).

Take the ears to your sewing machine. Sew right on the line around the perimeter of each leaving the straight edge unsewn.

Trim around each ear leaving a ⅛” seam allowance. Turn and press. Set aside.
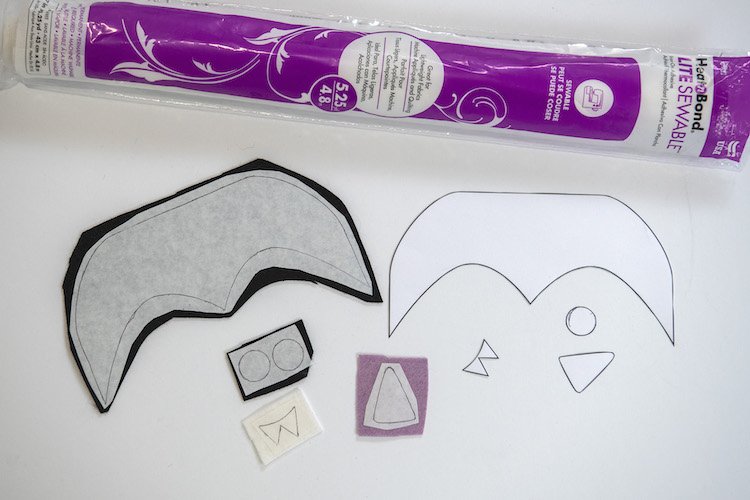
Grab your Heat N Bond. On the smooth side trace your hair, nose, two eyes, and one set of teeth. Cut around your Heat N Bond pieces and adhere them to your felt. Make sure to use a barrier cloth as the iron will melt your felt with direct contact. Cut out each piece.

First let’s adhere the hair to one of our main fabric head pieces. Lay your vampire head piece on your work table, right side up. Grab your hair piece and carefully remove the paper backing. Line your hair piece up with the top of your head piece and iron in place using a barrier cloth. Top stitch around the perimeter of the head piece and tie off the tails.

Next grab your head pattern and carefully cut out the eyes. We will use this to find our eye placement. Lay the pattern over top of your head and place the eyes. Iron in place and top stitch. Instead of backstitching, pull the thread tails to the back and tie off. Repeat with the nose.

Now let’s draw our mouth. There are two teeth options- one for the smirk on our vampire pattern and one with the teeth separated for any other mouth you’d like. If you like the smirk you can lay the pattern behind the head and holding your pattern/vampire head up to a window trace the mouth with a Frixion pen. I like to add eyebrows as well. Draw your face then grab your embroidery floss and hand sewing needle.

Take your needle and tie a knot in the end. For the eyebrow, make one long stitch from one drawn edge to the other.
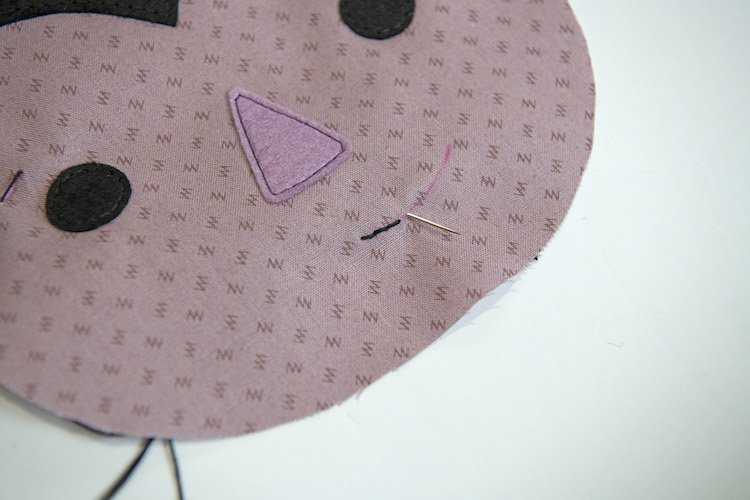
To embroider the mouth start at one end of your mouth and draw the needle through the fabric from the back. Take a stitch about ¼” or so and stick your needle back down.

Next take another stitch coming up ¼” away from your last stitch. Once you’ve pulled your needle through, place the needle back down in the same whole as your previous stitch. Repeat doing a backstitch all the way across your drawn mouth.

Next, place your teeth below your drawn mouth and press in place. Top-stitch.
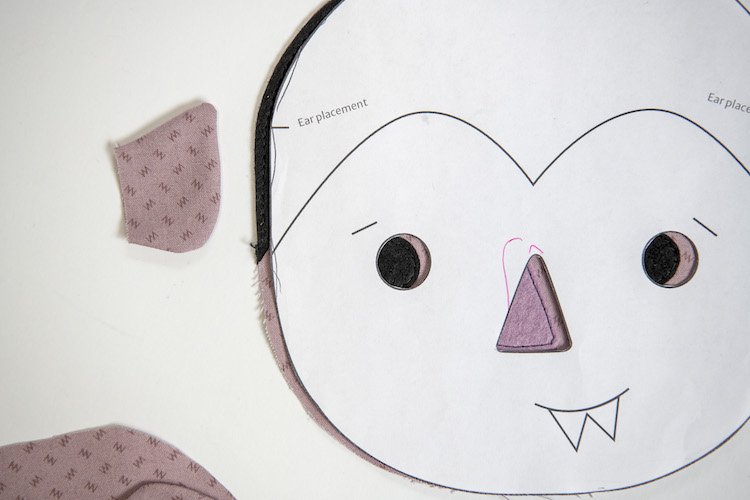
OK, you are just about done. Grab your pattern and your ears. Use the markings on your pattern to find the ear placement.

Pin the ears with the ear facing in and right side up with the raw edge overlapping the outside edge of the head by approximately ¼”.

Grab the back of your vampire head and with right sides together pin the main face and the back. Using a ¼” seam allowance sew from one side of the head to the other leaving the straight edge on the top open.

Turn right side out and press.

To string your characters into a banner take your double fold bias tape. I measure out 18” for the end tie then place my first character in between the fold of my bias tape. Take your next character flag and place it 2-inches away from the first. Repeat until all of your characters have been placed then measure an additional 18” tie on the end.

Take to your sewing machine and top stitch the bias tape, trapping the flags in place. Hang and enjoy. If you share on Insta or Facebook, please tag me (@stubbornlycrafty) or use #scpatterns.