Mummy Halloween Banner

Hi friends! Today we are making another flag for our Halloween character banner.
For the mummy you’ll need cheesecloth. I looked at multiple stores for the cheese cloth and found it the cheapest at Hobby Lobby. It’s in a package hanging on the wall. I had to ask so I thought I’d help you out.
Also, this was the last of the character making tutorials and I got a little less in-depth with it. If you have questions on any of the steps (sewing on the eyes, or if you want to do any embroidery for facial details) check out the Frankenstein and/or vampire tutorials. Some steps are better covered in those two tutorials.
Let’s get sewing!

Supplies:
Pattern (DOWNLOAD HERE)
100% cotton fat quarter
Cheese cloth
Black wool felt
Heat N Bond Lite Iron-On Adhesive
Marking tool
*You can get three mummy character flags out of each fat quarter. If you want more flags, purchase more fabric. ½ yard for six character flags, possibly seven.

Print and cut out your pattern. Carefully cut out the dotted line eye holes as well. This will help us with eye placement. You can find the FRANKENSTEIN PATTERN HERE and the VAMPIRE PATTERN HERE if you’d like to make a banner with more of the characters.

Iron your fabric and trace two of your mummy heads on the wrong side of your fabric. Trace your eye pattern onto your Heat N Bond and iron on to your black felt. Cutout.
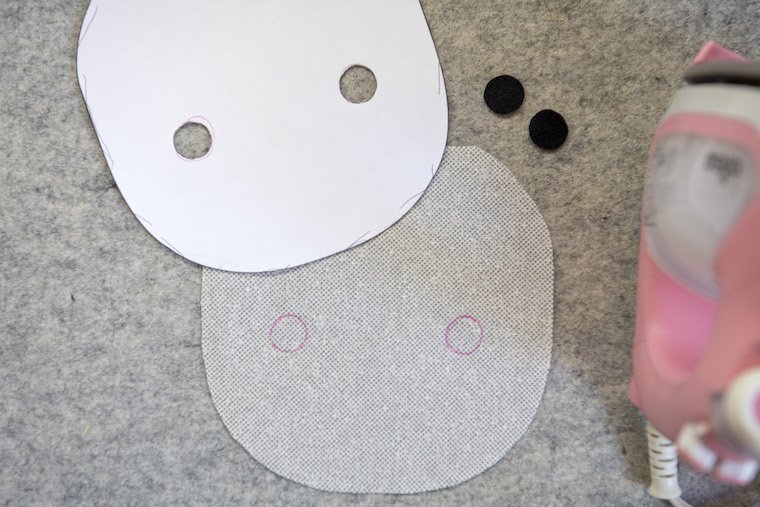
Lay your pattern over one of your head pieces, right side up, and mark the eye placement. Put your eye in place and using an iron and a barrier cloth (a piece of cotton fabric in between the felt and your iron) adhere them in place. Take to your sewing machine and top stitch around the perimeter of each eye. Pull the thread tails to the back and tie in a knot then trim the excess thread.
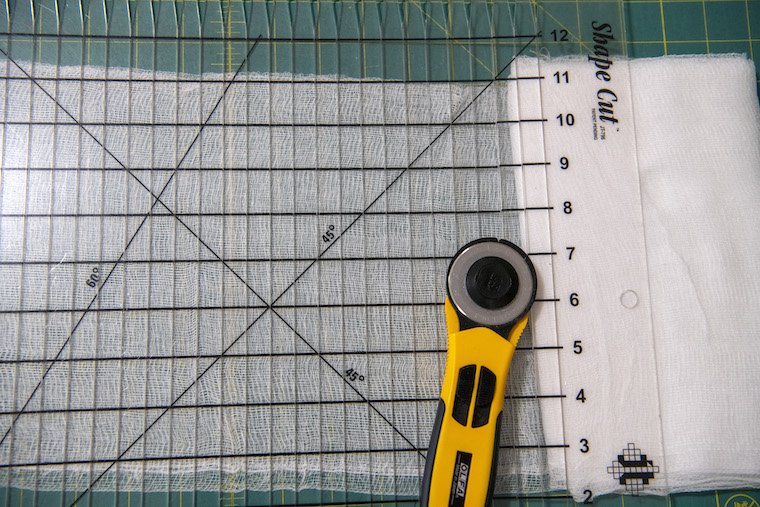
Grab your cheese cloth and cut a variety of strips measuring between 1” to 2” wide.
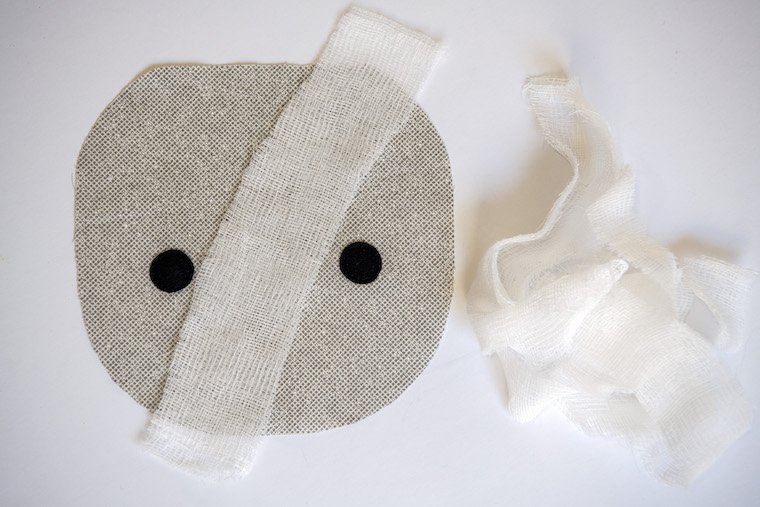
First we want to get in between the eyes. Place one of your wider strips at an angle between the eyes.

Take to your sewing machine and top-stitch the strip in place. Use matching white thread and you won’t have to even worry about sewing a straight line. It blends in.

Next add a strip horizontal by the top of the eyes. Continue adding stips and sewing them into place working on covering up all of the base fabric.

Once all of your base fabric is covered, turn your mummy head so it’s wrong side up and trim the excess cheese cloth.

Take the back head piece and pin the front to it, right sides together. Sew all around the perimeter using a ¼” seam allowance leaving the top straight edge open.

Turn and press.

To string your characters into a banner take your double fold bias tape. I measure out 18” for the end tie then place my first character in between the fold of my bias tape. Take your next character flag and place it 2-inches away from the first. Repeat until all of your characters have been placed then measure an additional 18” tie on the end.

Take to your sewing machine and top stitch the bias tape trapping the flags in place. Hang and enjoy. If you share on Instagram or Facebook, please tag me (@stubbornlycrafty) or use #scpatterns.