Turkey Applique Pattern & Tutorial

Years and years ago, I made this turkey applique pattern for a holiday pillow cover project I made for my mother and mother-in-law for Christmas. I’ve had a ton of requests for it the last few weeks so I decided to update and redo the tutorial for y'all. I’m glad I did because I love how he came out in all solid colors. Last time I made him out of quilter’s cotton which is also fabulous.
You can, of course, make it with whatever woven fabrics you prefer. We’re doing raw-edge applique so if you choose to use cotton, the edges will fray slightly. I went with 100% wool felt this time. On my original turkey I used small buttons for the eyes. I added felt eyes in the PDF, but you should do whatever floats your boat. I think it’d be adorable to add some detail to the tips of the feathers as well. So many options!
Let’s get sewing.

Supplies:
Pattern (DOWNLOAD HERE)
Fabric Scraps
Scissors
Pen
Sewing Machine
Iron/ironing board
Base Fabric for whatever you want to applique your turkey to (I’m making a 14”x14” pillow cover)

Print out your pattern. Trace the pieces on the smooth side of your Wonder Under. You’ll need seven feathers and just one of each other piece.
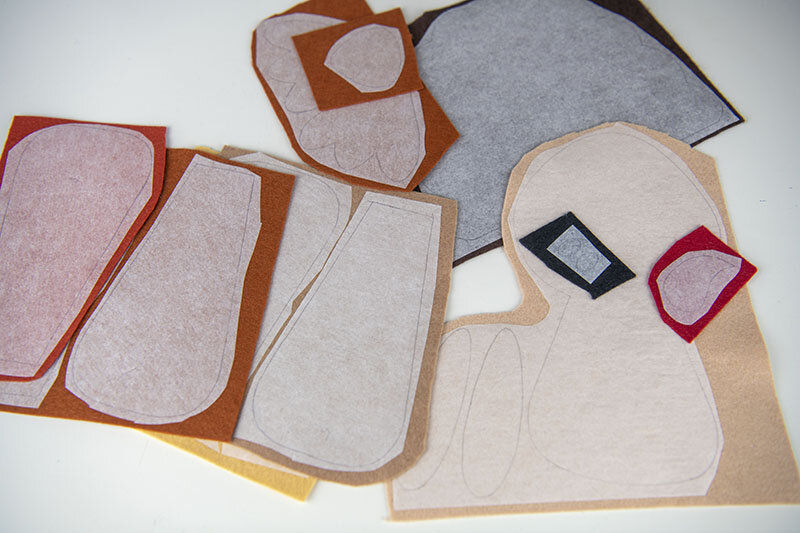
Cut around each piece drawn on your Wonder Under, leaving some negative space. Iron each piece to the wrong side of your chosen fabrics. If using felt like I did, make sure to use a barrier cloth between the iron and the felt to prevent melting or scorching the felt.
Next, cut out all your pieces. Take whatever project you’ll be applique-ing(?) the turkey to and lay it down on your work surface. Find the center. Read the directions on your Wonder Under if you’ve never used it before. To adhere your pieces, rip off the back paper before placing it on your project and ironing it down. If you have a hard time getting the paper off, lightly scratch it with a straight pin and use that small tear to lift it up.

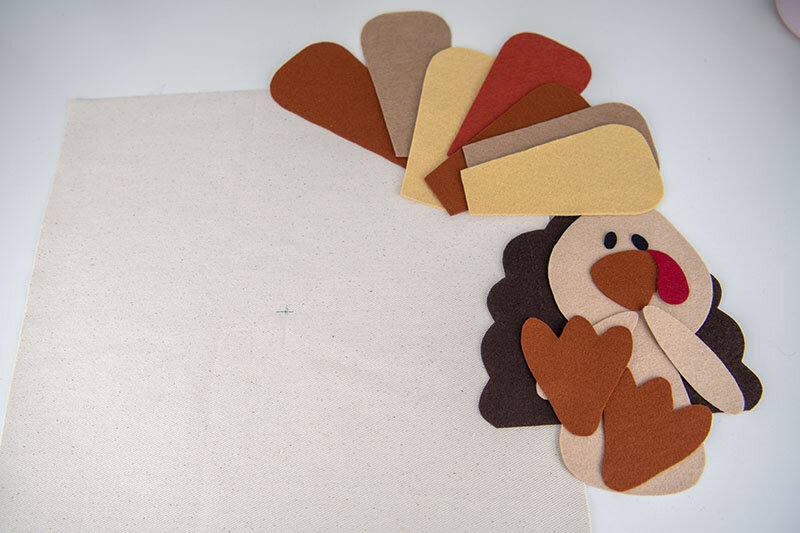
Start by placing the feathers. I like to use the front feathers piece to help guide my placement. The two outside feathers should line up in a straight line along the bottom with the bottom edge of the front feathers. Leave a little space between the other feathers and make sure they are even and centered as you go.
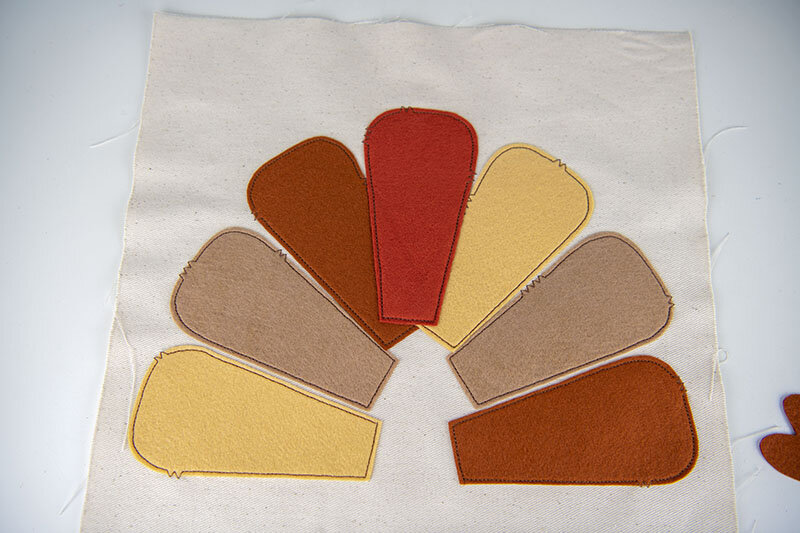
Sew each feather down one by one by top-stitching around the perimeter. I switched my machine from a straight stitch to a zigzag stitch while doing so to add a little extra detail. When finished, pull your thread tails to the back and tie them off. I overlapped my feathers a bit to fit my small pillow form. It’s not necessary, it really just depends on your project and preference.

Next, sew on the front feathers, lining the piece up with the straight edge along the bottom in a straight line with your bottom two feathers. Iron and sew in place.

Continue sewing the pieces, layer by layer. Sew on the wings next using the body piece to help figure out placement. Then sew on the body. To help with the eye placement, I like to cut the placement marks out from the body piece and use that as my guide. Remember to pull the thread tails to the back after each piece and tie them off. The nose, beak, and feet go next and the wattle is very last.

Once you have all your pieces sewn down, that is it. Now you just have to finish up whatever project you are adding your fun turkey to. If you sew up a turkey, please share it with us on our Facebook VIP page or tag us on Instagram (@stubbornlycrafty) or use the hashtag #scpatterns.