Reindeer Drawstring Bag Pattern & Tutorial

Hi, guys, Merry Almost Christmas! Today I have a quick drawstring bag to share with you. I designed it to be as quick and easy a sew as possible, perfect for whipping up last minute to fill with a few treats or small toys to elevate a simple gift. It’s all made out of felt which means no raw edges. It isn’t lined either so he (or she) can be made in a pinch. If you want to make it even more simple, you could use a few buttons for the eyes and a large pompom for the nose. I hope you dig it. Let’s get going on how to make your own!
Supplies:
Felt:
⅓ yard for reindeer face and ears (or three felt sheets)
2 felt sheets for antlers
1 red sheet
1 black sheet
¼” ribbon (Two 18” pieces)
Coordinating thread
Safety Pin
Tutorial:

Print out the pattern and cut out the pattern pieces. Take your felt and fold it in half (if by the yard) or layer two felt sheets on top of each other. Trace one reindeer main face and one ear on your main felt. You can use a Frixion or a different brand disappearing ink pen or just a regular pen and then flip it so the pen marks are in the back. I’m going to use a regular pen for this tutorial.

Once traced, used a few straight pins to hold the layers together and cut them out cutting through both felt layers. Set aside.
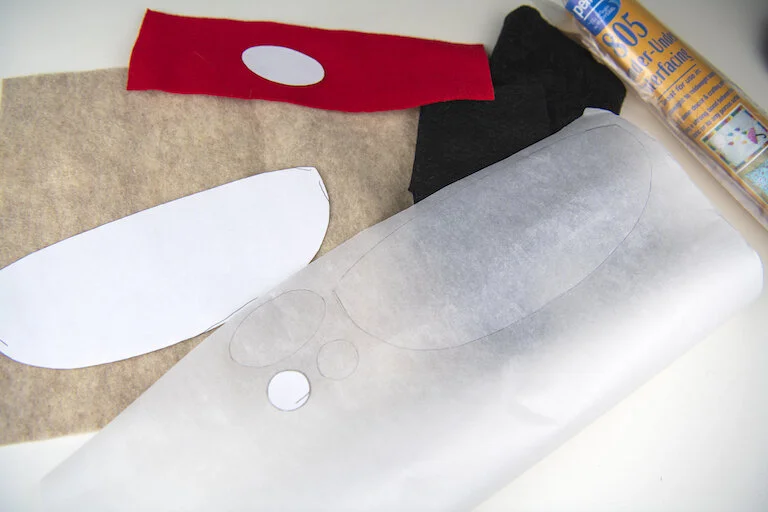
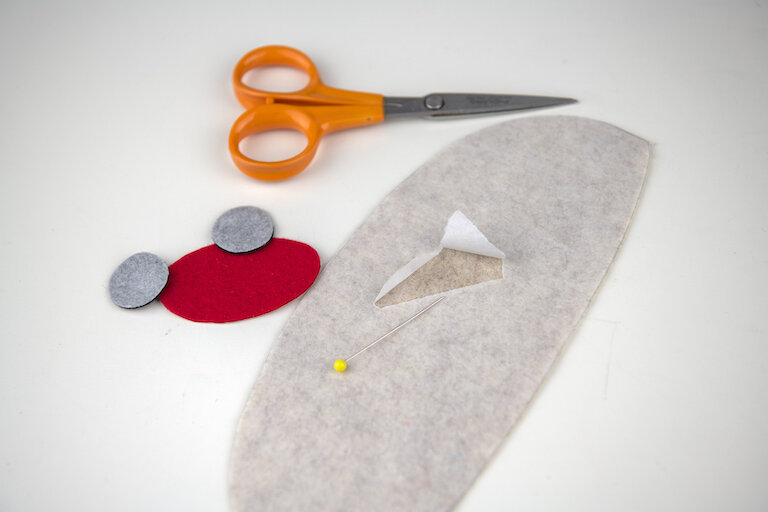
Grab your Wonder Under and your facial feature pattern pieces. On the smooth side of the onder Under trace a muzzle, a nose, and two eyes. Cut out leaving some negative space around each piece. Iron onto your colored sheets of felt (black eyes, red nose, lighter brown muzzle) following the directions on the package. Cut out each piece.
Ok, we are going to put our little reindeer’s face together. Grab one side of your main reindeer bag. Let’s place the muzzle first. Peel the paper off the back of the Wonder Under. If you find it difficult to get the paper off a good trick is to scratch the paper with a straight pin to start a small rip in the paper and then peel it off from there.
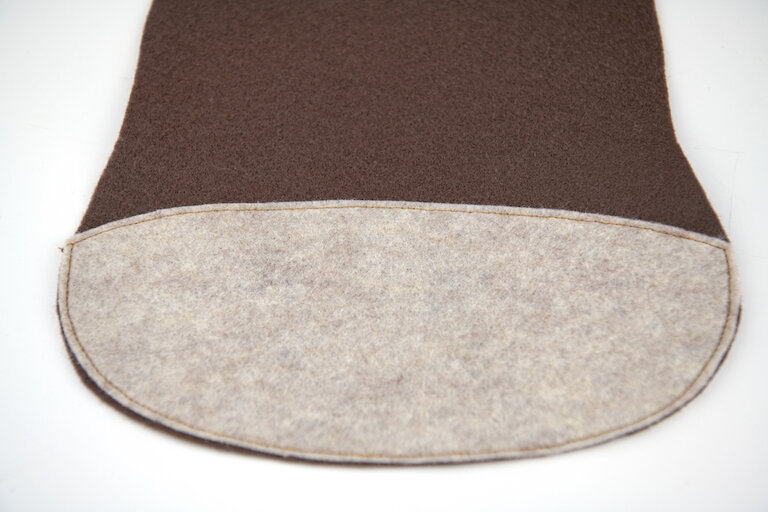
The muzzle lines up along the bottom of your bag's face. Iron in place making sure to use a barrier cloth so you don’t melt your felt. Sew around the perimeter of the muzzle. Start on a side or the bottom and either backstitch or tie off the tails.

To help with the nose and eye placement grab your main pattern piece. I like to cut out the nose and eyes from the pattern and then poke my felt nose and eyes through the holes while the pattern is over my main bag. Then I remove the pattern and iron the pieces in place.
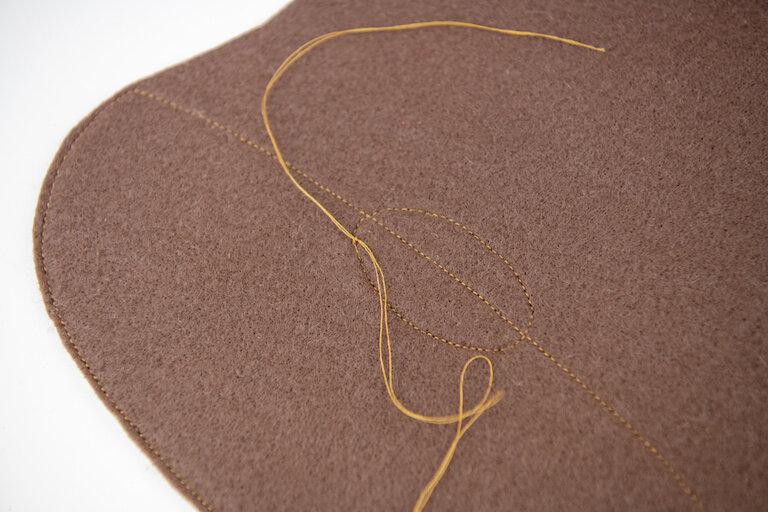
Take to the sewing machine and sew around the perimeter or each eye and the nose. Do not backstitch. instead pull your tails to the back and tie off.

Alright, now that his face is on let’s make our drawstring channel. Lay your reindeer’s face on top of the back panel again (so wrong sides together). On the top of our bag is a rectangle. Fold the rectangle on the top of your reindeer bag to the back until it lines up with the notches on the sides and pin. On the back bag panel fold the rectangle forward and pin lining it up with the side notches.

Take to your sewing machine and top stitch the flaps in place. Remember to backstitch at the beginning and end.

Ok, let’s make the antlers. Grab the felt for your antlers and the pattern. Fold your felt in half (so two layers). Trace one antler then flip the pattern, place it approximately and inch away from the first and trace another (so two antlers, mirror image).

For the antlers we will be sewing on the line and then trimming. Use a couple of pins to hold the layers together when sewing.

After you have the antlers sewn cut out leaving approximately ⅛” seam allowance. Set aside and grab your ears.

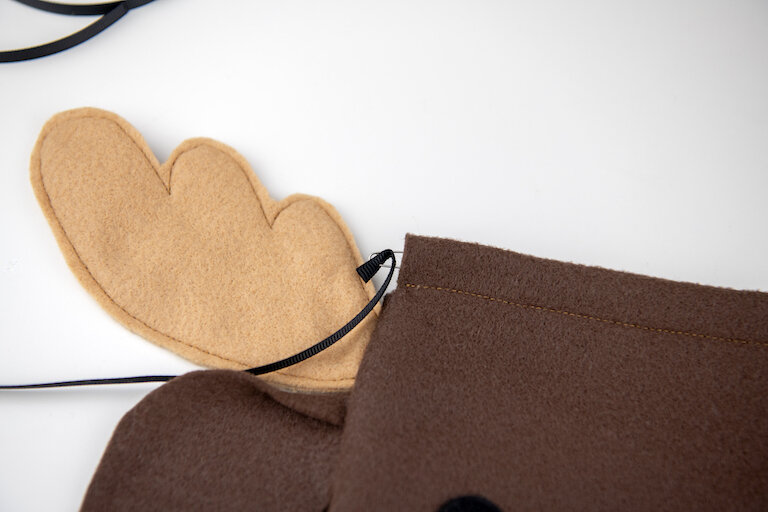
For the ears all we need to do is to fold each ear in half and tack them just along the edge on the straight side.
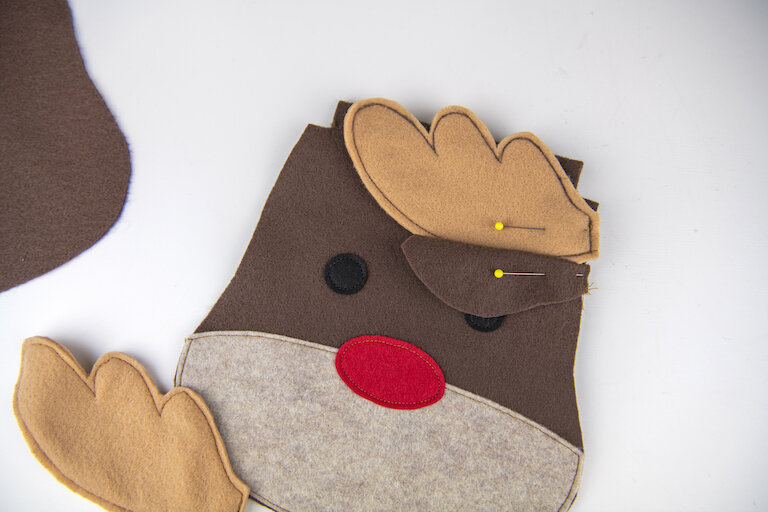
Ok, now we are ready to assemble our reindeer. Take your first antlers and just the top panel (the one with his face) of your reindeer. Lay your antler on your reindeer so the prongs are towards the top and the straight edge is lined up with the straight edge of the side of your bag. Pin the antler approximately ⅛” down from the top of the notch. Pin your ear right below that. If you used a regular pen make sure your pen marks are showing on the top now so when it’s assembled the pen will be facing the back.

Repeat with the second antler and ear on the other side. Tack in place.

Place the back panel on top, right sides together, and pin from one notch side to the other.

Sew using a ¼” seam allowance.

Turn right side out and press flat (remember to use a barrier fabric).
Now all we have left to do is put in our ribbon drawstring ties. Grab both pieces of ribbon (18” long) and a safety pin. Pin the safety pin on one end of your first piece. Thread it through your first channel and then back through the other until your ribbon comes out the same end you began. Tie the two ends together.

Repeat with the second strand going in the opposite side.
And that’s it. We are finished. I hope you enjoyed our sewing time together. I know I sure did. I hope y’all have a very Merry Christmas!